
Tutorial: Viewing projects
Locating a project
- Click on “Projects” within the banner menu. If you are a registered user and would like to access your own project, you can also click “My projects” within the User Menu.
- Scroll down and click on a project.
- To access a project text from the project home page, click one of the links under “Project Texts”. This will open up the project text page, which includes information about the primary source in addition to thumbnail images of uploaded files.
- To access the Ten Thousand Rooms Text Viewer, simply click on one of the thumbnail images. You can either scroll down to select a particular page or click the first thumbnail image you see.
Viewing images using the Ten Thousand Rooms Text Viewer
When you first open the viewer, you will see something like this:
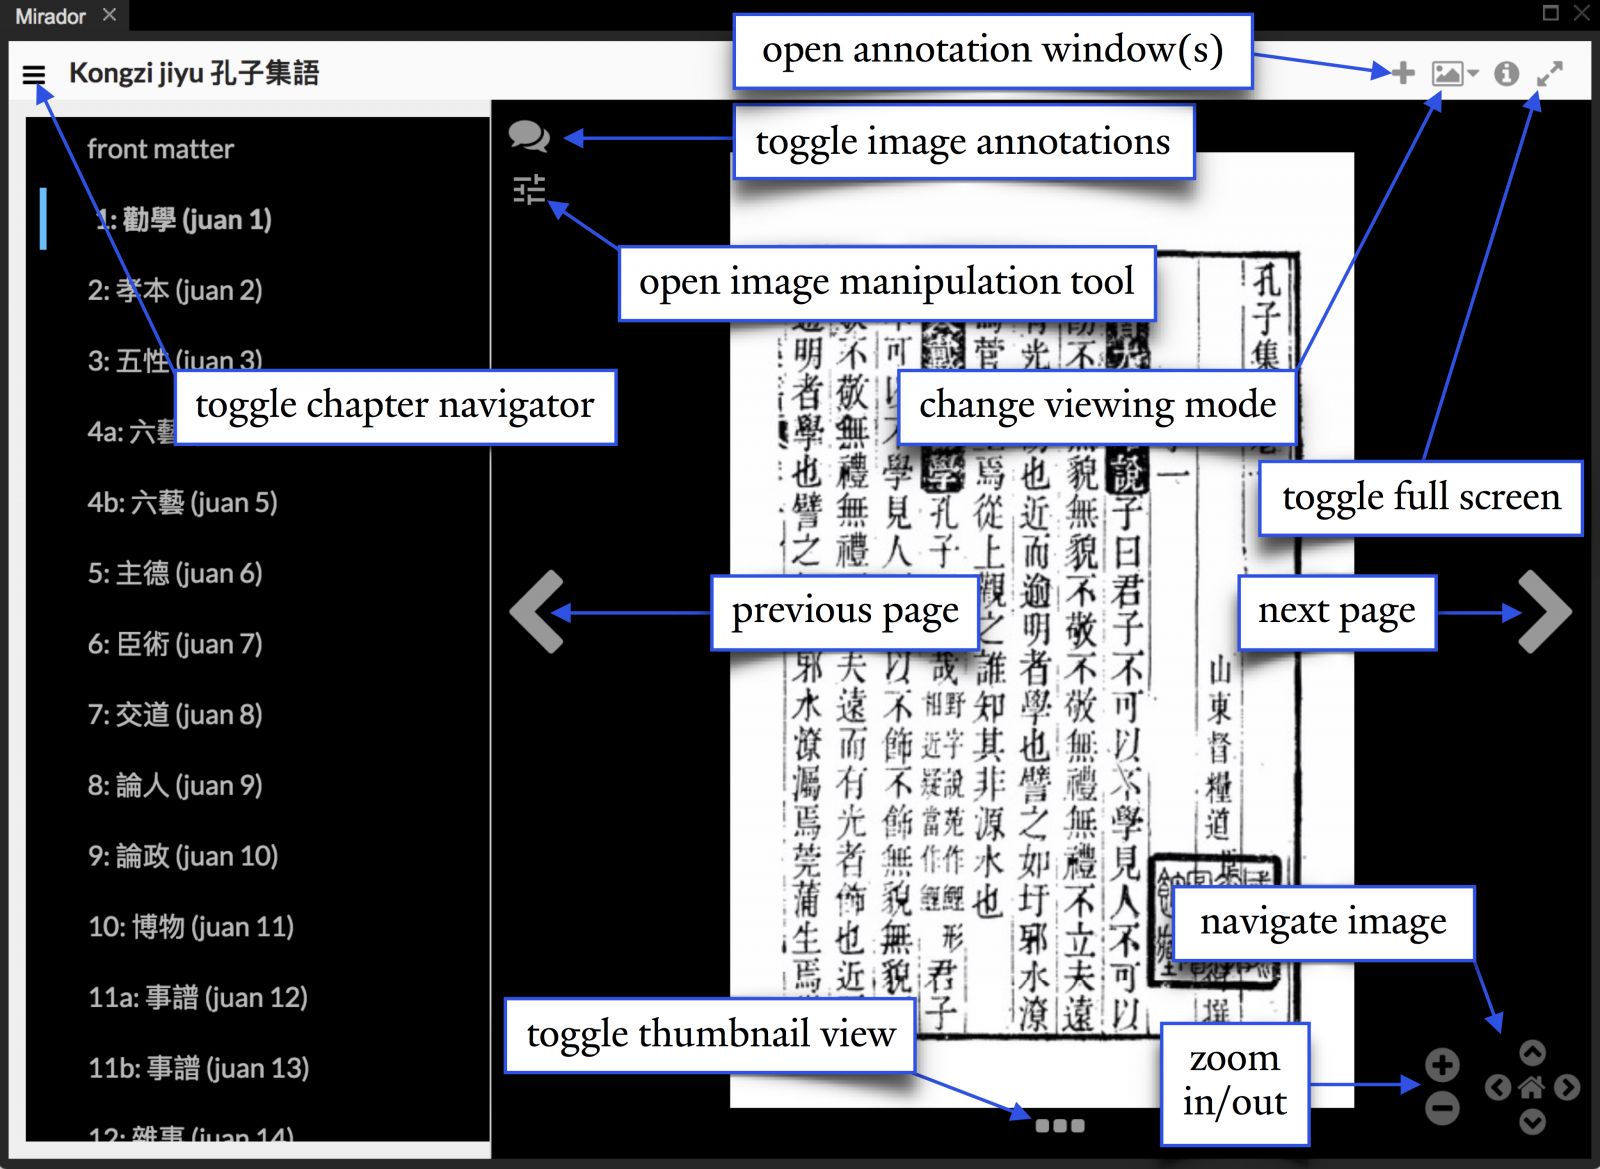
There are a number of ways to navigate texts using the viewer.
- To jump to another text division (chapter, juan, etc.), simply select the item you’re looking for within the chapter navigator side panel. When you are finished, you can click the chapter navigator toggle button to close the side panel.
- To go to the next page or go back to the previous page, click the arrows on either side of the image.
- To scroll through thumbnail images of the text, toggle thumbnail view by clicking the three square dots at the bottom of the window.
- To change how many images appear in the window, click the viewing mode button in the upper left corner. You can choose two view two pages (Book View), multiple pages from left to right (Scroll View), or multiple images in a matrix (Gallery View).
Viewing annotations using the Ten Thousand Rooms Text Viewer
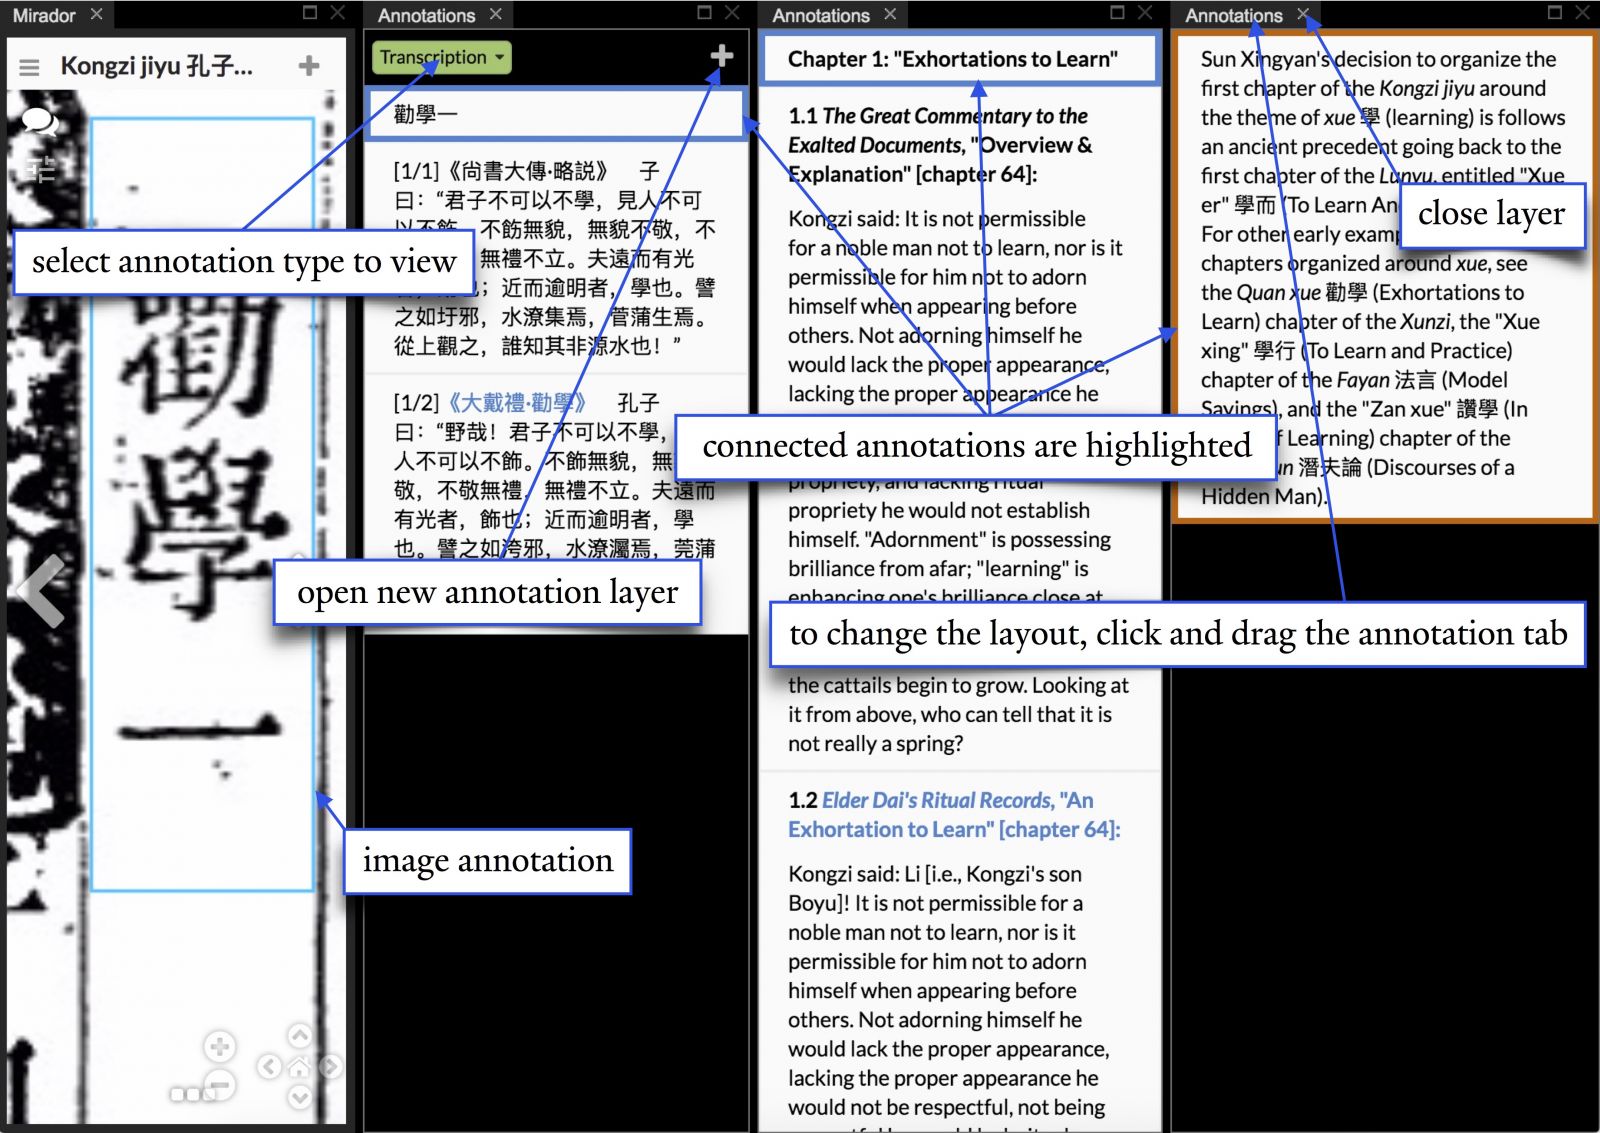
- To access transcriptions, translations, commentaries, or other content that has been added as part of the project, click the plus sign in the upper right corner. (Be sure to close the chapter navigation menu to conserve window space.) Click the plus sign again to add additional layers.
- To rearrange the annotation windows, click on the tabs marked “Annotation” and drag to the desired location. Annotation windows can be placed to the right, left, top, or bottom of the image or any other annotation window. The width of each window can also be adjusted as necessary.
- To change the annotation type within an annotation window, click the annotation type label to access the pop-up menu.
- To highlight the connections across annotation layers, simply click on an annotation item. As seen in the screenshot above, the image viewer will automatically isolate the relevant section within the image itself.